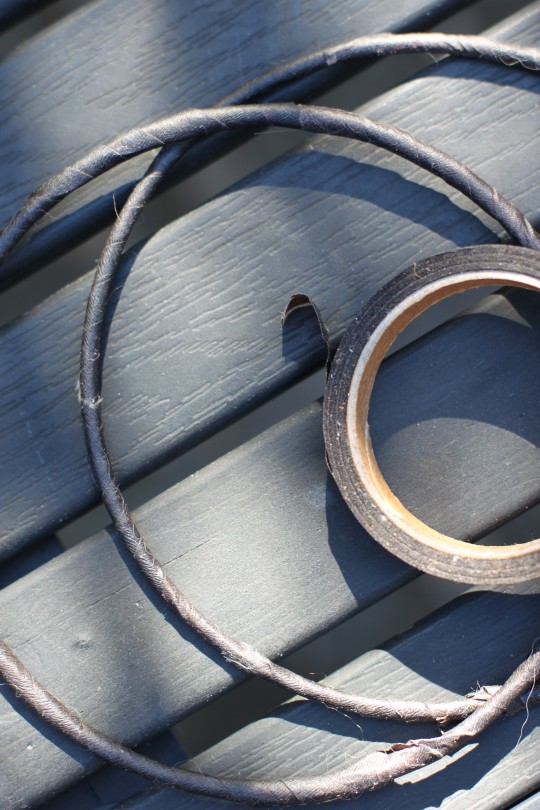
 The weekend before last, we celebrated Zoe's 7th birthday with a dream catching party. Each of her friends strung beads and hung feathers to create her very own dream catcher. With a bit a prep work you too can host a party like Zoe's. Depending on the age of your guests, more or less preparation may be required. I went ahead and prepared the rings by wrapping them in tape and weaving them with string. Separately, I also took leather strips and cords, and with Zoe's and Natalia's help, strung one bead at the end of them (to secure the ones the guests would later choose). Take a look below for the list of supplies and instructions on how to make it these creative party favors come to life:


Supplies:
5"metal rings, brown floral tape, waxed thread, leather strip remnants, glass, ceramic and wood beads, assorted feathers and cording in assorted colors.
Instructions: Prep the frame and strings.
1. Wrap each metal ring with floral tape.
2. Weave the rings. I followed this You Tube video.
3. Prepare 5-7 leather strips and cording per guest and secured a bead on each end. This way your guests can add beads and attach feathers without anything falling off.
Party Setting:

1. Place one prepped ring at each seating.
2. Drape an assortment of 5-7 beaded leather strips and/or cording next to the rings.
3. Put a handful of asorted beads at each place setting.
4. Place a mixture of feathers in cups or small vases along the length of your table.
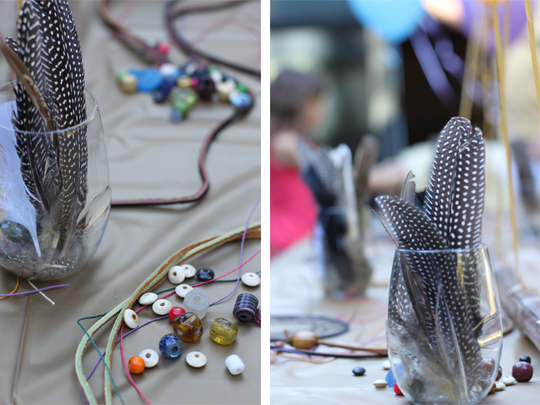
5. Have the children add beads and feathers to the beaded strings. The feathers can be pushed inside the bead holes or secured with floral tape.
6. Once the strands has been adorned, have your guests knot them onto the rings.
7. Voila!! And don't forget to explain how dreamcatchers came to be...

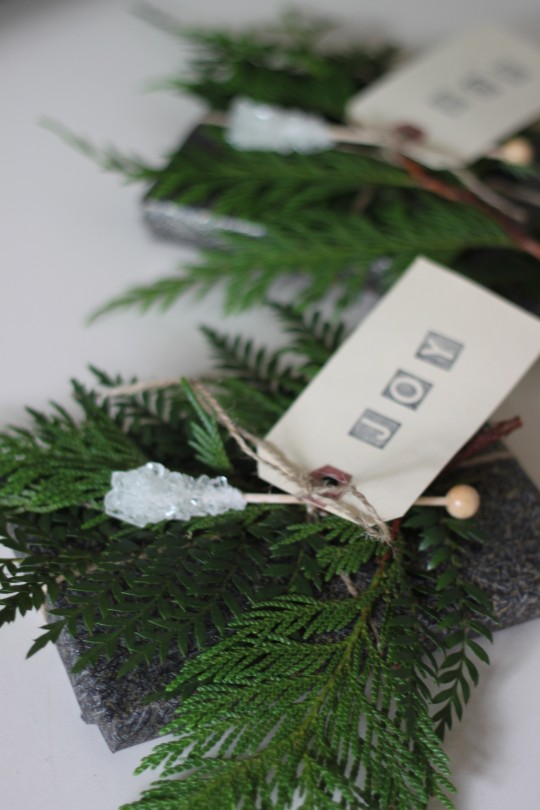
 The holiday wrapping marathon has begun and this year there's something a little sweeter about it: sugar sticks. Yes, I'm adding sugar sticks to our packages this year. The secret is out for any of you who are receiving gifts from us. The rest of the embellishment is quite simple. It is comprised of twine, an oversized cedar sprig and a fern frond. I especially like when the greens hang over the packages as if they were concealing their contents. Take a look:

 Do you have a special motif for this year's holiday gift wrapping? Do share if you do. Together we can start our very own pinterest board!


